Anchor
Welcome to your first Solana Anchor smart contract experience using the Código platform.
1️⃣ Prompt Your Idea
Once inside your workspace, tell the AI what you want to build.
generate a counter solana program with create_counter and increment instructions

Wait a few seconds while Código initializes the workspace with everything for you.
Código will respond with a full plan and architecture.
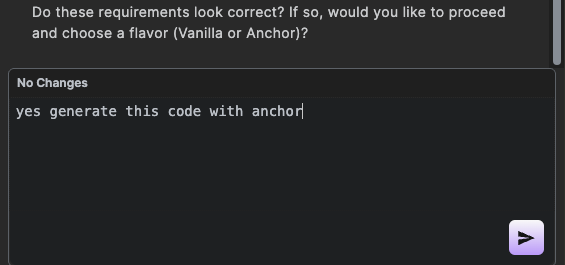
If you're happy with the proposed structure, confirm and choose between native or Anchor framework :
yes generate this code with anchor
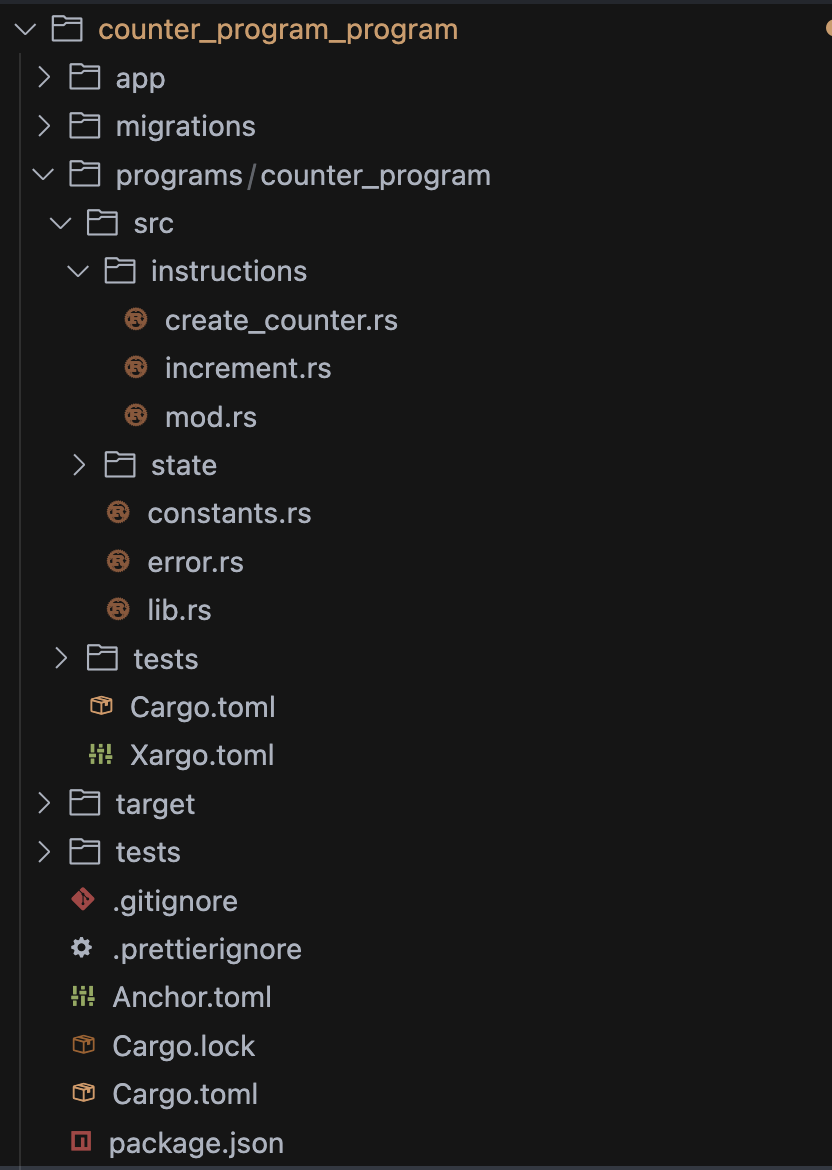
Once selected, your program is ready with all the files generated! 🎉
2️⃣ Implement the Instructions
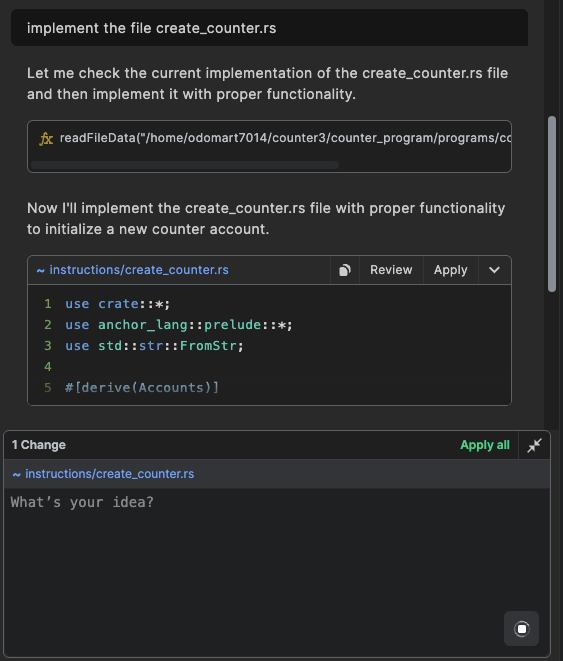
The generated files come with scaffolding, but the instruction logic is left for you to implement.
implement the file create_counter.rs
Review the AI implementation by clicking on the Review button.
If it looks good, just click Apply and it will automatically update your file code with the new changes.
Repeat this process for each instruction file.
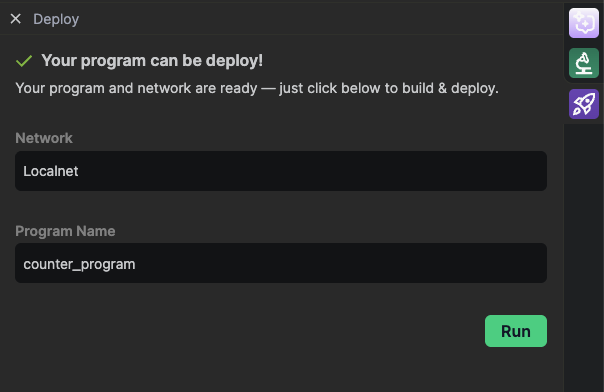
3️⃣ Build & Deploy
Once all your logic is implemented, build and deploy your smart contract:
Select your environnement and use Codigo UI to build and deploy in 1 click
For full details 👉 See Build & Deploy guide
✅ Código already sets up a local
solana-test-validatorand provides you with a preconfigured wallet keypair.
✅ Next Steps
🎉 Congratulations! You just built and deployed your first Solana program with Código.
To recap, you've learned how to:
- Set up a new project with zero config
- Prompt the AI to generate your smart contract
- Customize business logic instruction by instruction
- Build and deploy using the terminal