How to Build & Deploy
This guide walks you through the process of building and deploying your smart contract using Código, whether you chose the Anchor or Native Solana framework.
🧱 Prerequisites
Make sure you've:
- Created a workspace on Código Hub
- Generated your program with DevAI (via prompt or template)
- Implemented the logic in your instruction files
If you haven't done these steps yet, start with Start from Prompt.
🚀 Build and Deploy with Codigo UI
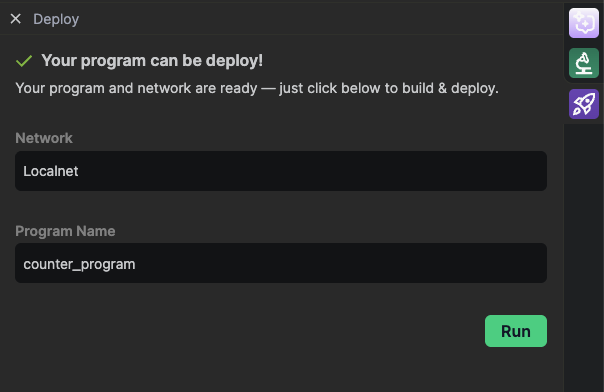
The easiest way to build and deploy your smart contract is using Código's intuitive UI interface in 1 click
Step 1: Access the Deploy Button
Click the Build & Deploy button in the Código Hub navbar.
Step 2: Select Your Environment
Choose your target environment from the dropdown:
- Local - For local development and testing
- Devnet - For development and testing on Solana's devnet
- Testnet - For testing on Solana's testnet
- Mainnet - For production deployment
Step 3: Deploy
Click the Run button to start the build and deployment process.
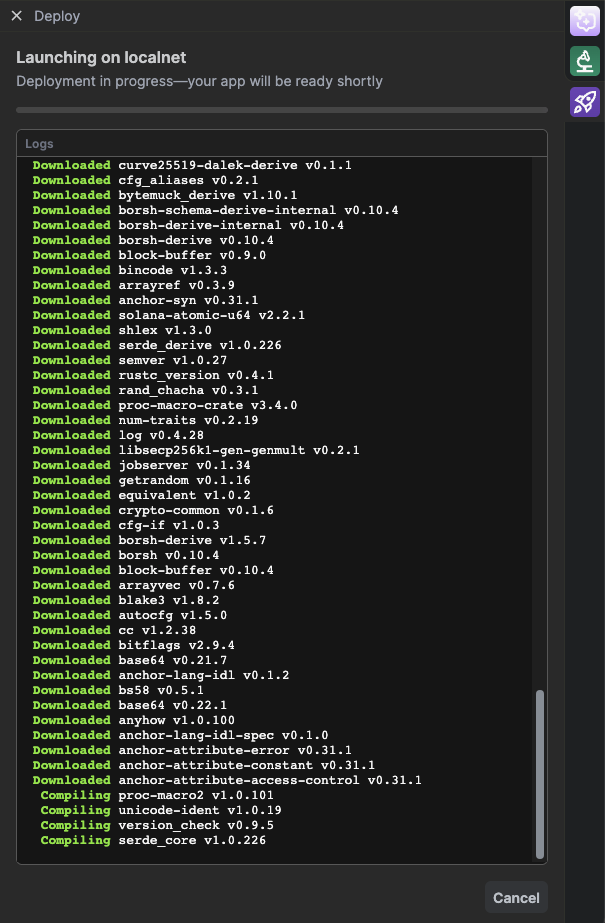
Step 4: Monitor Progress
Watch the build and deployment progress with real-time logs.
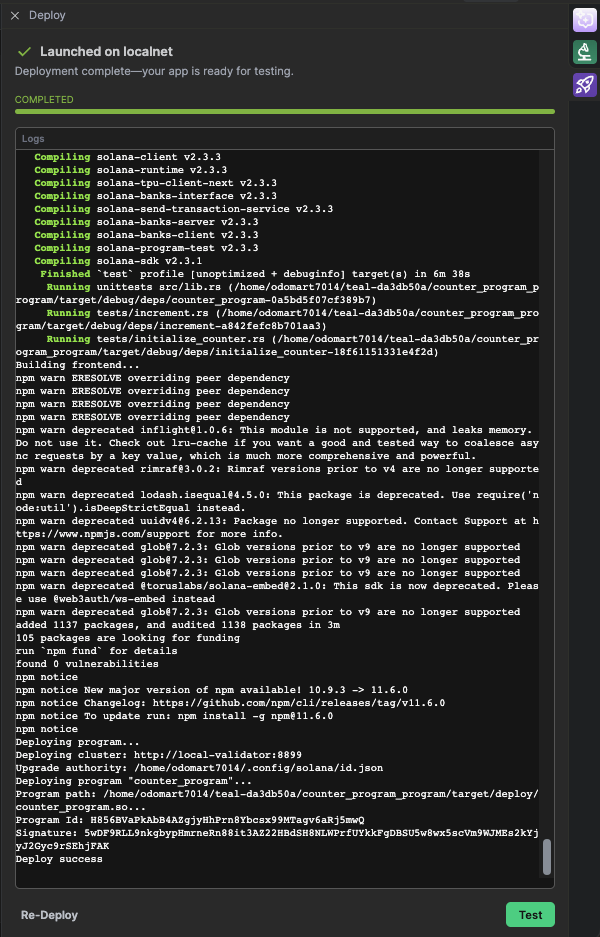
Step 5: Success!
Once completed successfully, you'll see a confirmation message with your Program ID.
If the deployment fails, you'll see an error message with a "Diagnostic the error with AI" button. Clicking this button will automatically copy the error details to the AI chat, allowing the AI to help you diagnose and fix the issue.
🖥️ Build and Deploy with Terminal
For advanced users who prefer command line deployment
1️⃣ Build Your Program
Open a terminal in Código Hub.
For Anchor Programs
cd program
anchor build
This command compiles your Anchor smart contract and generates the IDL and .so file under the target/ folder.
For Native Programs
cd program
cargo build-sbf
This compiles your native Solana program using the standard Solana SDK toolchain.
2️⃣ Select Your Environment
Before deploying, choose the Solana cluster you want to target:
solana config get
solana config set --url <environment>
You can use predefined aliases or full RPC URLs:
devnet→https://api.devnet.solana.commainnet-beta→https://api.mainnet-beta.solana.comlocalhost→http://127.0.0.1:8899- Or any custom RPC endpoint (e.g. from Triton, Helius, QuickNode)
💡 Example command
solana config set --url devnet
# or
solana config set --url https://api.helius.xyz/?api-key=YOUR_API_KEY
ℹ️ Código uses a preconfigured local validator by default when working inside the IDE.
3️⃣ Deploy Your Program
Once built, you can deploy to your chosen Solana cluster.
Código will use the wallet and network selected via solana config.
For Anchor Programs
anchor deploy
For Native Programs
- Make sure your validator is running (for local):
solana-test-validator
- Then deploy your
.sofile:
solana program deploy target/deploy/<your_program>.so
Replace your_program.so with the actual name if different.
✅ Deployment Success
Once deployed, you’ll get a Program ID. You can now:
- Interact with it via the Código test interface
- Build a frontend
- Start writing integration tests or unit tests
⚡ Quick Deploy Example
If you want to deploy your program faster with fine tuned settings (e.g. on mainnet), here’s a sample command using QUIC, higher compute unit price, and custom RPC:
solana program deploy ./target/deploy/<your_program>.so
  --max-sign-attempts 1000
  --use-quic
  --with-compute-unit-price 10000
  --url <your_rpc>
  --program-id ./target/deploy/<keypair>.json