Build the Frontend dApp
When you generate a Solana program with Código, it also scaffolds a frontend web app inside your workspace. This guide shows you where it lives, what it contains, how to preview it live, and how to iterate quickly using AI prompts.
🧩 Frontend generated folder
Your project includes a ready-to-use frontend scaffold under app/, prewired to your program.
app/, prewired to your program.- Location: The scaffolded app is created under the root
app/folder of your Código project. - Purpose: It is pre-wired to your generated program so you can immediately interact with it from the browser.
- Key integrations out of the box:
- Wallet connect: Phantom and other wallets are already set up via a wallet adapter provider.
- Solana libraries:
@solana/web3.js,@coral-xyz/anchor,@solana/wallet-adapter-wallets. - Client helpers: Reusable utilities for RPC calls, PDAs, and instruction helpers.
App Repository layout
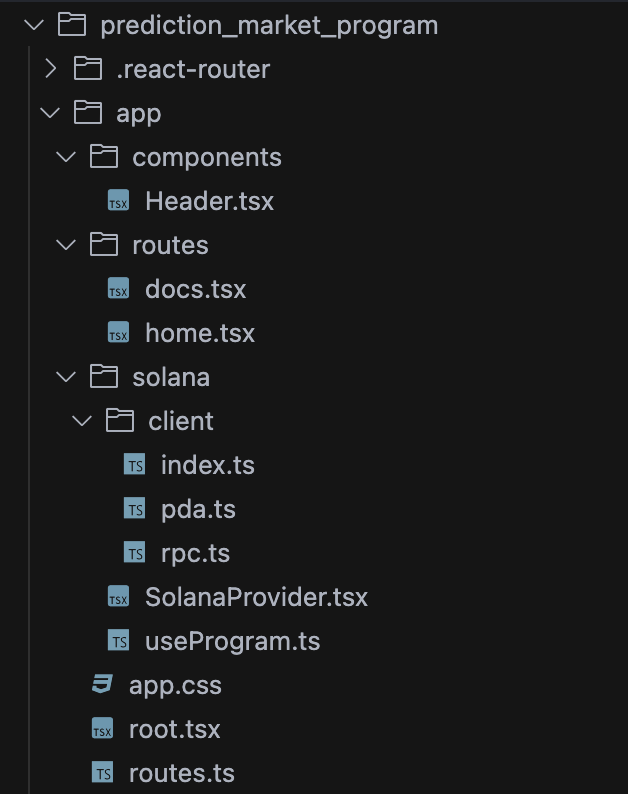
Main files
-
pda.ts: PDA derivations and address helpers.
import { PublicKey } from "@solana/web3.js";

export function deriveMarketPDA(creator: PublicKey, programId: PublicKey) {
  return PublicKey.findProgramAddressSync(
    [Buffer.from("market"), creator.toBuffer()],
    programId,
  );
} -
rpc.ts: Client helpers to interact with your smart contract (setters and getters).
await program.methods
  .createMarket("Who wins?")
  .accounts({ feePayer, market, creator, systemProgram })
  .rpc();

const marketAccount = await program.account.market.fetch(market); -
SolanaProvider.tsx: Wallet connection and environment (cluster) selection.
<ConnectionProvider endpoint={endpoint}>
  <WalletProvider autoConnect wallets={wallets}>
    <Outlet />
  </WalletProvider>
</ConnectionProvider>
🖼️ Live Frontend Preview
Preview the app live inside Código with one click from the right navbar.
-
Click the fourth icon on the right navbar, then select Run to start the preview.
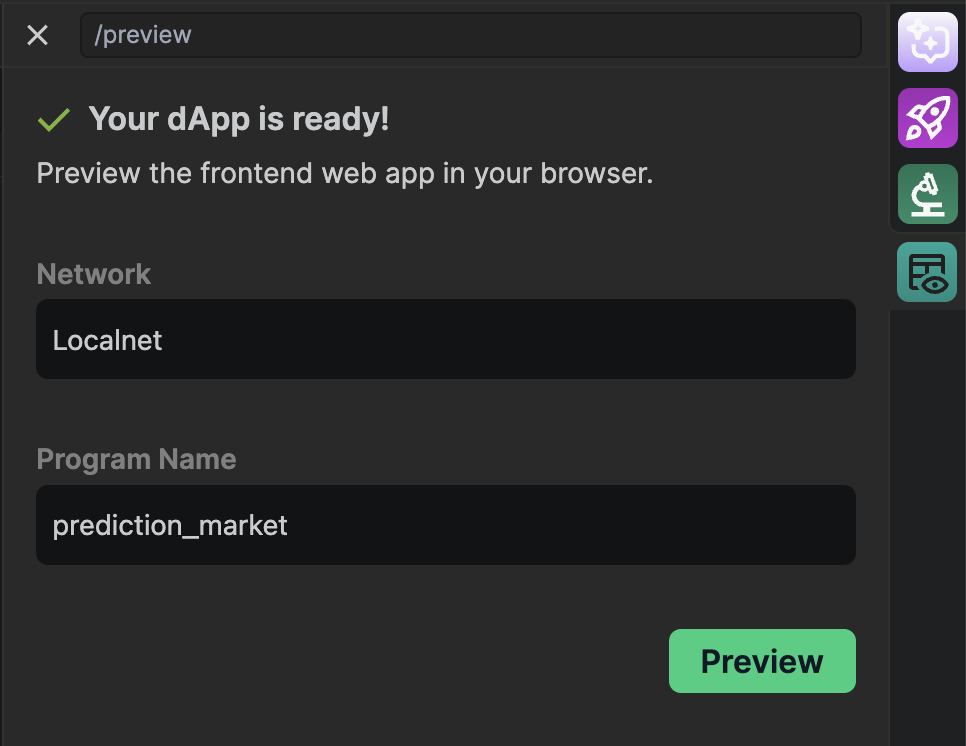
-
Código will install the frontend dependencies for you. You can see the installation process in the logs below, let it finish.
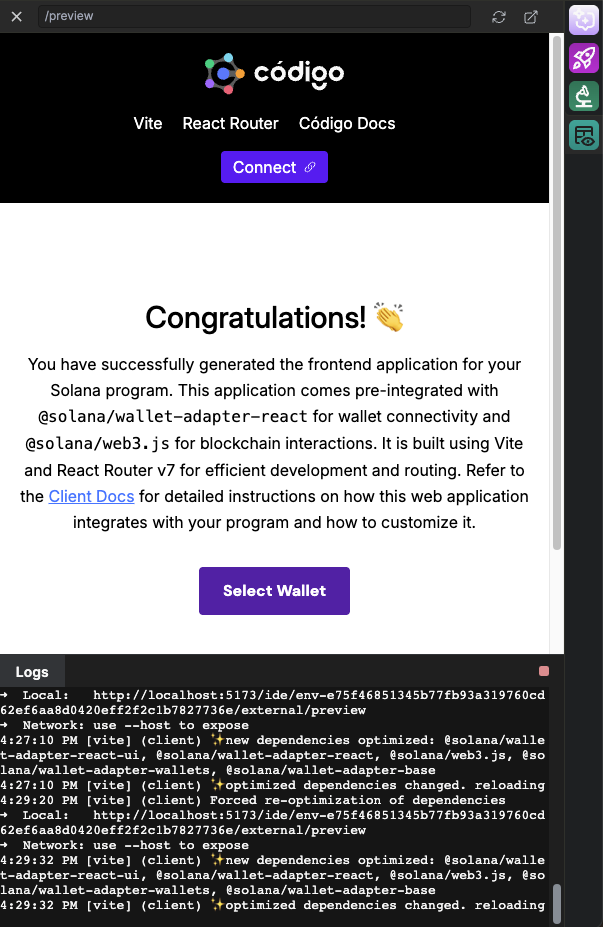
-
Your frontend preview is visible! Ready for you to customize with the AI chat. The preview reloads automatically after each code change.
Tips
- Refresh: reload the app preview
- Open in new tab: view the preview full screen or work multi-screen
🤖 Customize the Frontend with AI
Use AI chat to build components and connect them to your program quickly.
Prompts to try:
Generic frontend
In the frontend /app folder, create a new component about my project.
Keep it self-contained, with placeholder data and simple styling.
Frontend component with details
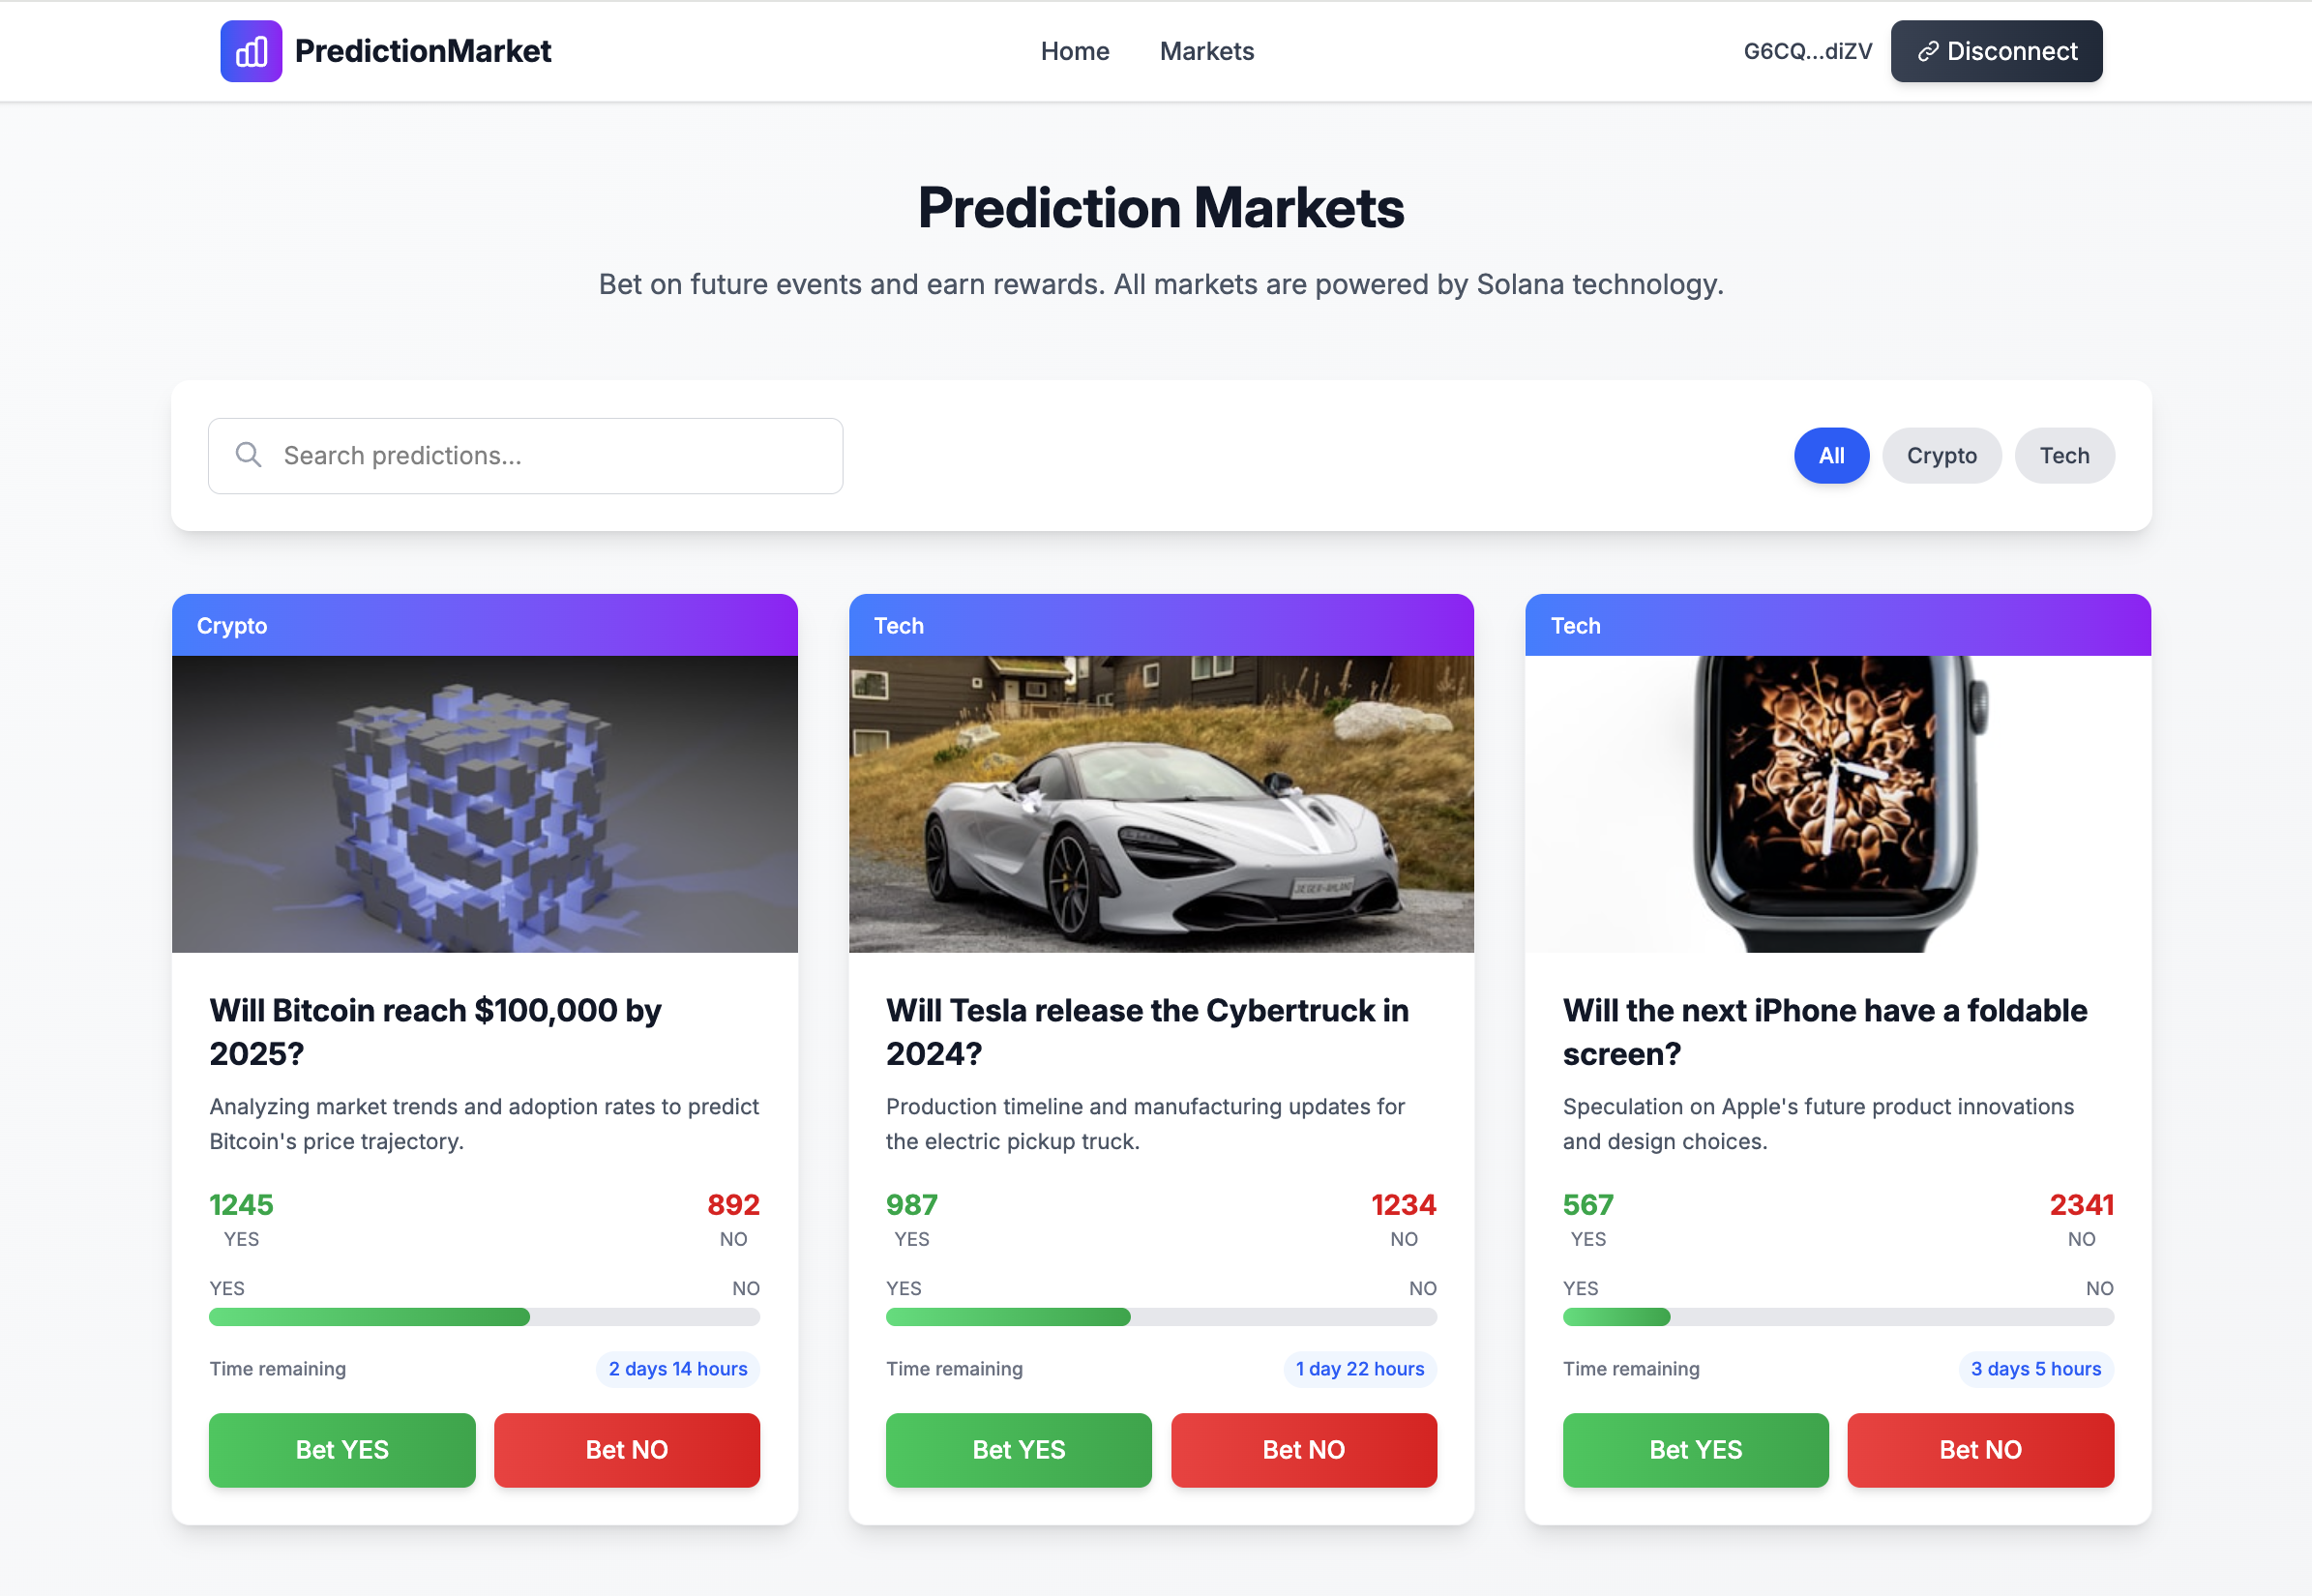
In the frontend /app folder, create a new component for my prediction market:
a list of predictions in progress with title, description, YES/NO counts, time remaining, and two buttons to bet.
Use mock data for now; we’ll add the program interaction later.
Frontend interaction with program
Connect the "Place Bet" button to my program’s placeBet instruction using app/solana/client/rpc.ts.
Add basic validation and show success/error toasts.
Enhance style design
Improve the design of the header and prediction market component.
Use modern spacing, typography, and button styles, and make it responsive.
What to expect:
- AI will think and propose file edits (e.g., new component files, updates to routes, providers).
- Review the diff and click Apply to save the changes.
- The preview reloads automatically to reflect updates.
Example Result of a prediction market with Codigo: